I’ve always wanted to have my own home server. I’ve even bought Intel NUC for that which I intended to use, but I never got around to configuring it properly so it has gathered dust while not in use.
But in motivation strike, I decided to finally get around to do it, and implement it.
Infra automation not always the best way to move forward
First of all, I don’t want to be it a maintanence burden at all. With that comes also the need to be able to recover from possible hardware failure easily (and by that I mean all the configuration has to be available somewhere without much manual work).
Initially, I wanted to use Ansible to just automate it, but then I realized that handling home server which I just want to be working it’s too much overhead. I’ve always got that feeling that if there is something trival I want to change in the server (like a value in config file) it made me anxious that I didn’t use Ansible for that, because then I had to re-do that in Ansible, and if I forgot / didn’t do it it would lead to configuration drift, making the Ansible useless… yeah, you understand why I’m hesitant to using Ansible. Feedback loop for using Ansible for home server is just too big / complicated. If the changes were to be reflected immediately it maybe would be wise, but for a single server most-likely pet server? nah.
Using complicated monstrosity for less complicated setup
This might sound like paradox, but by using Kubernetes which is a complex beast, we can achieve simplicity thanks to its popularity. I’ve came to the conclusion after years of reluctance to kubernetes that thanks to the fact it became defacto standard for container orchestration, everyone is working toward making it easier / better / more efficient to work with it. A lovely example of that is tool called k9s which became my Go-To tool for managing Kubernetes clusters.
While plain docker setup has also such tools, like Portainer, I think it caters to different needs and portainer becomes platform-in-a-platform sort of tool and it doesn’t make it easier to deploy things, merely makes it more GUI based.
We also don’t have to use K8s directly, there are distributions like k3s or k0s (I wonder what will be next - k8-8s?). The biggest difference between full-blown k8s, and distribution like k3s is that k3s bundles everything in a single binary, so we don’t have to care about deploying / provisioning all of that. It provides sane defaults on how to manage it. While for production clusters it might be desirable to use k8s (never deployed it myself for production, always done using managed control plane solutions), k3s is mostly compatible with existing kubernetes supported projects which you will see later on in article.
Requirements
It’s always good to know what do you want to achieve by the end of the day, and for me this is it:
- Disaster Recovery - in case of a hardware failure causing full halt of our service we want to be able to recover easily.
- k3s backup&resotre
- restic - encrypted backups for anything else
- b2 - for storing the backups
- sanic feedback loop when it comes to adding / removing / changing things
- Thinking between following solutions
- I want the IDE/Editor to be there always, independently of which device I use / where I am. And I want it to be preconfigured because each time I need to configure it on different device, my motivation to keep home server running drops significantly
- Secure external access - this is hard requirement for me.
- While I could go through the hops of using wireguard to tunnel the traffic and make it invisible on the internet, not every piece of software supports that flow (like HomeAssistant), and having VPN connected all the times drains the battery. I’m lazy, and I prefer things which don’t require me thinking.
- SSO Authelia
- SSO caddy auth portal
- Alternatives mentioned on hacker news
- My ISP’s IP is hidden
- I could expose everything through my IP, I’ve IPv4 assigned and can port forward whatever I want, but I consider it to be a too big of security risk to expose myself to the internet like that. I might forgot to patch some zero day, or expose something without auth that allows RCE
- Recently discovered frp (fast reverse proxy) which seems to be a perfect solution to my problem.
- Freedom and privacy
- This comes as a result of doing it manually, but in the days of CSAM-like scanning I think its important to start regaining full privacy to your content.
- It’s not about having illegal stuff hidden from the cops (and I don’t intend to hide anything like that [it’s what people who do say, huh?]), its about their ability to be able to convict you based solely on the content you have. Now it’s only CSAM scanning for clear purpose - but can you trust your authorities to not screw up by accident? Or by intention if you become political enemy? I can’t.
- And also tracking and advertisments. I make pictures of reciepts that I take from shops - how do I know that cloud provider I use to store pictures doesn’t scan them? I simply can’t know that.
External Access Architecture
This is what I did. It doesn’t have to be the same for you. You might want to expose http of frp directly for example.

Provisioning cluster
For the cluster to be running and accepting external traffic several things need to be done. Read about them below. Quick summary of what will be done:
- Setting up HTTP frp server
- Setting up frp client and forwarding traffic to traefik
- Setting up SSO portal and accessing it from outside world
Of course that is not everything I want to achieve with my home server - but that looks like a good baseline for everything else. I might create more articles based on that? Who knows.
Setting up frp server
We will be using frp server to be able to access our private addressed cluster from the outside world. We intend to only use http forwarding for now, but it can be expanded for https and more.
Setting up the frp server is pretty straightforward. They provide you with binary for all OSes. As I use external shell provider which shares single IP across multiple accounts, I had to reserve the specific port that I’ll be using for gainig external access. They also have shared http/https server, which allows reverse_proxy functionality. What I did was:
- Download the frp compressed package for freeBSD (provider’s OS)
- Run new screen session using
screen -S frp_servercommand - Create new directory for
mkdir ~/frps - Create configuration file
frps.ini
My configuration file for frp server has following configuration:
[common]
bind_addr = <external_ip>
bind_port = <port_for_frp_server>

kcp_bind_port = <port_for_frp_server>

vhost_http_port = <port_for_frp_server>
vhost_https_port = <port_for_frp_server>

log_file = <home_dir>/frps/frps.log

log_max_days = 7
log_level = info

authentication_method = token

token = <your_custom_token>

allow_ports = <port for services other than http, can be left same as bind_port>
Great thing about frp is that it’s smart. It’s smart to the point that it knows the difference between tunneling traffic and user traffic. Thanks to that, it allows you to utilize single port for all the functionality required for forwarding http. As I only had a single port reserved on shared hosting, it was great for that purpose.
To run the frp server in the background, I simply run ./frps -c frps.ini and leave the screen session with key combination ctrl + a | d (that means ctrl + a keys and then d key)
For going back to frp session you can screen -r frp_server
Setting up reverse proxy for frp
Because I used shell provider, they’ve had a nice propertiary GUI for setting up the reverse proxy. Equivalent of that setup would be something along this in nginx (assuming nginx and frp are running on the same host).
  server { # simple reverse-proxy
    listen  80;
    server_name  frp.your_domain.com;

    location / {
      proxy_pass      http://127.0.0.1:<port_for_frp_server>;
    }
  }
I’m using frp.your_domain.com for matching the virtual host through whole guide.
Although, if you use VPS provider, you should just directly expose the frp proxy on http and https ports by specyfing vhost_http_port and vhost_https_port as respectively 80 and 443 ports.
You might also need to run frp as root in that case (using sudo ./frps -c frps.ini for example) since ports 80 and 443 are only allowed for elevated access.
Important: Setting up SSL endpoint
Although not covered here, after I’ve added reverse proxy I’ve also set-up https access to the server.
It is hard requirement for anything that reasembles secure environment. For nginx reverse proxy setup, setting up let’s encrypt seems to be the best way.
I didn’t cover (and done yet) encrypted traffic between frp server and client - but that will come later.
For pain-free SSL, you can use Certbot. There is also cloudflare which acts as a reverse proxy too and provides SSL out of the box.
Setting up k3s on the home server
I’m assuming you’ve got the server up and running, configured in your network with private static IP, and that machine has full access to the internet. I personally used Ubuntu 20.04 OS.
To install k3s on that server, all you have to do is run commands on the k3s site.
curl -sfL https://get.k3s.io | sh -
# Check for Ready node,
takes maybe 30 seconds
k3s kubectl get node
! Warning - always check the content of the shell scripts you’re running. Never run untrusted shell scripts directly from the internet.
If you’ve got it right you should see single node output in k3s kubectl get node command. That means it’s all working and ready to use.
Accessing your k3s from outside the machine (but inside the network)
I’m assuming you’re using a machine that is in the same network that your home server is.
Doing everything on the server itself can be tedious so we will use external access to kubernetes cluster.
For that we need to copy a file that was created by k3s in /etc/rancher/k3s/k3s.yaml. For that we can simply do scp <user>@<server>:/etc/rancher/k3s/k3s.yaml . and that will copy the file onto your local machine.
You also need to change one line in it:
server: https://127.0.0.1:6443
This needs to be changed to IP address of your home server, in my case it’s 10.5.10.5
server: https://10.5.10.5:6443
Change it like so, and save the file.
Now you have to install kubectl, just follow the official guide for your OS. In case of arch linux / manjaro, I used yay kubectl and installed the available package.
After you get kubectl installed, all that is left to do is to replace your ~/.kube/config file with the one you just downloaded from your server. Simply run cp <path_to_k3s.yaml> ~/.kube/config, in case the directory doesn’t exist create it using mkdir ~/.kube.
Now you should see the same output when running kubectl get nodes on your PC.
NAME             STATUS   ROLES                  AGE   VERSION
intel-nuc        Ready    control-plane,master   21h   v1.21.3+k3s1
Adding frp client to the cluster
As we’ve got frp up and running, accessing the frp endpoint should yield following output:

That means nothing is yet connected to frp and it is just serving the default page. That also means it’s working correctly.
For setting up frp server in the cluster, I created following k8s manifest frpc.yaml
apiVersion: v1
kind: Namespace
metadata:
  name: frp
---
apiVersion: v1
kind: Secret
metadata:
  name: frpc-config
  namespace: frp
stringData:
  frpc.ini: |
    [common]
    server_addr = <frps_ip_or_domain>
    server_port = <frps_port>
    token = <your_custom_token>

    [web01]
    type = http
    local_ip = traefik.kube-system.svc
    local_port = 80

    custom_domains = frp.your_domain.com
    header_X-Forwarded-Proto = https
---
# header_X-Forwarded-Proto assumes that you're redirecting http traffic to https, so that the access is always through SSL.
# If that is not the case, remove the line. But it won't work with SSO presented later.
apiVersion: apps/v1
kind: Deployment
metadata:
  name: frpc
  namespace: frp
  labels:
    app: frpc
spec:
  replicas: 1
  selector:
    matchLabels:
      app: frpc
  template:
    metadata:
      labels:
        app: frpc
    spec:
      containers:
        - name: frpc
          image: snowdreamtech/frpc:0.37.0
          volumeMounts:
            - name: config
              mountPath: "/etc/frp"
              readOnly: true
      volumes:
        - name: config
          secret:
            secretName: frpc-config
If you create frpc.yaml file and paste the manifest in it, you should be able to run kubectl apply -f frpc.yaml to get frp client up and running.
After that, you should see traefik error when accessing frp.your_domain.com domain.
404 page not found
That means frp works correctly and that you’re able to access it from the outside.
Storing k8s manifests in git
A nice feature of kubernetes manifests is that you can store them in git repository. That means when next time you want to setup a new cluster, or recreate existing one, all you have to do is to just reapply the manifests you stored in git. That is one of the things that make Disaster Recovery faster. You don’t have to recreate the setup yourself, you just apply what you already have/had. This will be even more powerful later on.
Authelia for SSO portal
After we got traefik access up and running, next step for us is to setup Authelia.
I chose that project, even though it’s not yet fully-featured (like Caddy’s counterpart) simply due to documented (somehow) way to make it work with traefik (which is built-in to k3s).
I’ll be deploying login portal on /ssoauth endpoint. Sadly authelia doesn’t support multi-level subpaths or dashes
Authelia deployment manifest
apiVersion: v1
kind: Namespace
metadata:
  name: authelia

---
apiVersion: v1
kind: Secret
metadata:
  name: authelia-config
  namespace: authelia
stringData:
  configuration.yml: |
    jwt_secret: <your secret>
    server:
      host: 0.0.0.0
      port: 9091
      path: "ssoauth"

    log:
      level: debug
    authentication_backend:
      file:
        path: /config/users_database.yml
    access_control:
      default_policy: deny
      rules:
        - domain: frp.your_domain.com
          policy: one_factor

    session:
      name: authelia_session
      # This secret can also be set using the env variables AUTHELIA_SESSION_SECRET_FILE
      secret: unsecure_session_secreta
      expiration: 3600  # 1 hour
      inactivity: 300  # 5 minutes
      domain: frp.your_domain.com  # Should match whatever your root protected domain is
    # TODO: make this on PVC and backup it
    storage:
      local:
        path: /tmp/db.sqlite3
    notifier:
      disable_startup_check: false
      filesystem:
        filename: /tmp/notification.txt
  users_database.yml: |
    users:
      your_user:
        displayname: "Your name"
        password: "$argon2id$yourhash"
        email: your@email.com
        groups:
          - admins
# For password hash generation use https://argon2.online/
# Choose params:
# type: `argon2id`
# Memory cost: `128`
# hash length: `32`
# parallelism: `8`
# iterations: `2`
# Mount files that are going to be modified by authelia in /tmp instead of /config default path
---
apiVersion: apps/v1
kind: Deployment
metadata:
  name: authelia-server
  namespace: authelia
  labels:
    app: authelia-server
spec:
  replicas: 1
  selector:
    matchLabels:
      app: authelia-server
  template:
    metadata:
      labels:
        app: authelia-server
    spec:
      enableServiceLinks: false
      containers:
        - name: authelia-server
          image: authelia/authelia:4.30.4
          volumeMounts:
            - name: config
              mountPath: "/config"
              readOnly: false
          ports:
            - containerPort: 9091
              name: http
      volumes:
        - name: config
          secret:
            secretName: authelia-config
---
apiVersion: v1
kind: Service
metadata:
  name: authelia-server
  namespace: authelia
  labels:
    name: authelia-server
spec:
  ports:
  - name: http
    port: 9091
    protocol: TCP
    targetPort: 9091
  selector:
    app: authelia-server
Important things about this:
- We’re specyfing authelia to listen on 9091 port. And we’re also exposing the service for that port so we can access it from outside world later on.
- Access control config that I provided is just for presentation purposes, adjust it according to your own needs and consult the manual.
- Anything that is writeable by authelia (like sqlite or mailer config) needs to be in writable place (like
/tmp) - You need to generate JWT secret and your user’s password best using
argon2. Authelia supports having different / dynamic backends for that like postgreSQL or MySQL. But for testing purposes and or home use I think this is generally fine as is. - You may want to configure 2fa using solution like OTP tokens.
Applying authelia manifest
Save the content of this snippet to authelia.yaml file, and apply it using kubectl apply -f authelia.yaml
Special case for no https behind reverse proxy
Because I used the reverse proxy setup where termination of SSL happens on the public IP provider (my shell box in that case),
I had to trust X-Forwarded-* headers in traefik config. Sadly because of the fact that traefik is bundled and preconfigured you have to provide special config on the server.
It is documented in official k3s docs, and they even specify that specific example.
Without that you will be getting Unauthorized with following error:
Scheme of target URL http://frp.your_domain.com/ must be secure since cookies are only transported over a secure connection for security reasons
Even though that your public endpoint is secured.
Quick fix for trusting forwarded headers
Even quickier method, although probably needs to be reapplied every time is to just add - --entryPoints.web.forwardedHeaders.insecure at the end of traefik deployment specification at
  spec:
      containers:
      - args:
        (...)
        - --entryPoints.web.forwardedHeaders.insecure
Adding ingress for accessing authelia endpoint
After we got the authelia deployment done, we still need to tell traefik on how can we even access authelia.
In recent kubernetes and traefik versions you can use Ingress directly to achieve that.
(I’m saying that because previously you would have to use annotations for that and they can get really ugly)
For the ingress object, it can be as simple as that:
---
kind: Ingress
apiVersion: networking.k8s.io/v1
metadata:
  name: authelia-web
  namespace: authelia
spec:
  rules:
    - host: frp.your_domain.com
      http:
        paths:
          - pathType: Prefix
            path: /ssoauth
            backend:
              service:
                name: authelia-server
                port:
                  name: http
What it does is that it exposes the authelia server endpoint on /ssoauth sub path, just like we specified in authelia config.
We need to expose authelia in one way or another because that is where you will be doing the log-in.
Applying ingress manifest
Save that to authelia-ingress.yaml and apply using kubectl apply -f authelia-ingress.yaml
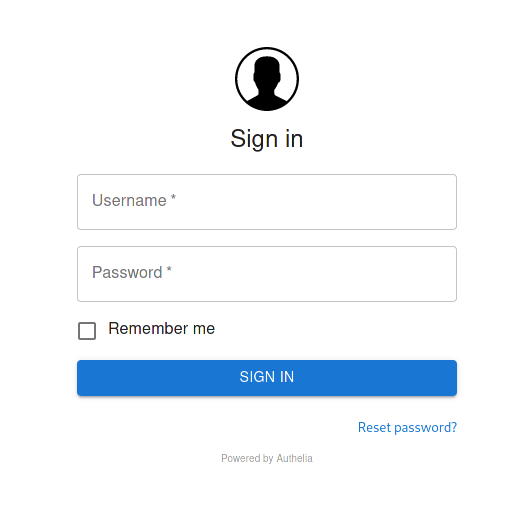
Testing if everything works
We should now be able to access https://frp.your_domain.com/ssoauth/ and see our login page.
Making service accessable through SSO
If we got authelia setup right, we should now be at the state where:
- We have external access on https://frp.your_domain.com
- We have authelia portal on https://frp.your_domain.com/ssoauth/
One last bit is to now create a service which will be hosted on our server and accessable through auth portal.
Creating forwardAuth middleware
traefik has a concept of forward auth middleware.
Image on their site nicely explains the concept.
In short what it does is that it asks external service if we should have access to target service, and if the service says OK authorized, it allows traffic. If not, it will redirect for authorization and then let the traffic.
Principle is pretty simple, and so is the implementation
Middleware manifest
apiVersion: traefik.containo.us/v1alpha1
kind: Middleware
metadata:
  name: authelia-auth
  namespace: authelia
spec:
  forwardAuth:
    address: http://authelia-server.authelia.svc:9091/api/verify?rd=https://frp.your_domain.com/ssoauth/
    trustForwardHeader: true
    authResponseHeaders:
      - Remote-User
      - Remote-Group
      - Remote-Email
Let me explain here what happened:
- We use Middleware Custom Resource Definition (CRD) for setting up middleware object.
- We point it to use
authelia-serverservice inauthelianamespace. Syntax for addressing services is<service_name>.<service_namespace>.svc. We could omit theservice_namespacebecause we create middleware in the same namespace, but it is always better to be explicit in that IMO. - Authelia after authorization will add
Remote-*headers, we’re choosing to add them to the final request so the server can utlizie them if it supports authorization through headers for example. - Endpoint for checking authorization is
/api/verifyand it accepts parameter calledrdfor telling it where to redirect if authorization isn’t there.
We need to apply the manifest as always.
Configuring our service to use forwardAuth middleware
If we got some service running in our k3s cluster, for example popular testing container whoami
I used this guide to deploy the whoami Deployment and Service
Assuming you’ve done the same here is how to make it use our middleware.
---
kind: Ingress
apiVersion: networking.k8s.io/v1
metadata:
  name: whoami
  namespace: default
  annotations:
    traefik.ingress.kubernetes.io/router.middlewares: "authelia-authelia-auth@kubernetescrd"
spec:
  rules:
    - host: frp.your_domain.com
      http:
        paths:
          - pathType: Prefix
            path: /
            backend:
              service:
                name: whoami-service
                port:
                  name: http
The most important thing here is traefik.ingress.kubernetes.io/router.middlewares: "authelia-authelia-auth@kubernetescrd".
Syntax for specyfing middleware:
<namespace>-<middleware_name>@kubernetescrd
- means the namespace where middleware was defined, in our case it is namespace: authelia- <middleware_name> - means the name of middleware as specified in manifest, in our case it is
name: authelia-auth
The rest of manifest just tells to host whoami-service on / path. that will be frp.your_domain.com.
Apply the manifest.
Checking if our SSO setup works
Now if you followed the guide, and the guide is correct (assuming I didn’t forgot any detail), accessing https://frp.your_domain.com/ should redirect you to https://frp.your_domain.com/ssoauth/ where
after logging in you should be able to see the response of whoami service.
Wrapping it up
Definitely this is not a finished setup, but I hope this is a good base setup for making your services gated through SSO. If there are any mistakes in the article, or missing information, or something is wrong, please reach out to me. I tried my best to include all the necessary details to replicate what I’ve done
What is left here:
- Secure the connection between
frpclient and server - Deploy some meaningful service onto
k3s - Make that service SSO aware (so that you don’t need to go through dual auth hop).
- Make deployments automatic
- Create personal cloud for editing and configuring
k3sfrom within (using previously mentionedgitpodlike solutions) - Create backups and test disaster recovery.
- Making a cluster? Currently using
k3sin single node setup
I hope that will come later if my motivation allows me :)